


Cold air hits your teeth in the lot after the lifts close, or salt is still drying white on your wrists while someone shakes sand off a towel by the tailgate. That's the moment a hat has to work. Not on a product page. Not in a mockup. In real light, at conversation distance, when you've decided to holster your tech and actually talk to the people next to you.
Custom embroidery hats fail right there more often than they fail on the machine. A pretty file gets approved on a flat screen, then it lands on a soft, curved crown and turns to mush. The fix isn't more options. It's less, on the right blank, proofed in thread before anyone commits to a set. Restraint reads as luxury. Clutter reads as merch you'll leave in the rental.
Pick a Hat the Stitch Can Live On
Your boot buckles are stiff with cold and the lot smells like woodsmoke from a cabin up the road. You pull off a helmet or a beanie and reach for something that makes you look like a person again for the first drink in town. That hat is making your introduction while your phone stays pocketed, so it needs to hold its shape and hold a mark without shouting.
Start with the blank, because the blank decides the stitch. Thread can't fix geometry. A crown that collapses will wrinkle a design no matter how clean the digitizing is, and a panel that curves hard will move your logo even if the file is perfectly centered.
A structured six-panel cap is the safest bet for a group. The front stays firm off your head, so lettering stays flat and a shared mark lines up across a wedding party, a groomsmen set, or a corporate drop. If everyone's hat needs to match in photos, this is the one. Read up on the shape itself in this guide to the 6-panel hat before you argue about fonts, because the panel will outvote the font every time.
An unstructured cap is the opposite deal. It feels better after a long beach day, broken in and low, the hat you wear from sand to bar without thinking. It doesn't want a heavy fill. As the crown softens and folds, dense stitching pulls and wrinkles with it. Give it a small tonal mark, initials, a short word, and it'll age gracefully. Give it a full color crest and you'll watch the edges go wavy by the second wear.
Match One Blank to One Outing
Curved-brim performance caps sit in the messy middle. They're built for sweat and movement, and the front panel drops away faster than a structured front. Art that looks centered in a file can sit high or drift toward a seam once it's hooped on the curve. Keep that mark low and narrow, and proof it on the actual hat.
Beanies and buckets need even more honesty. On a beanie, the cuff is the only stable ground you get. Stitch on the stretchy body and your clean letters go oval the first time someone pulls it on. On a bucket or visor, a short mark on a flat panel works, but a soft crown will pucker under dense fill, and there's no structure hiding the damage.
Social Spec: A structured crown keeps the mark readable through a whole tailgate conversation. That's the functional point, since a hat that holds its panel flat lets people read the name, catch the joke, and start the serendipitous encounters you're actually there for.
Which blank can carry the stitch
| Blank | Where the stitch holds | Main failure | Best outing |
|---|---|---|---|
| Structured six-panel cap | Front panel, crown stays firm | Seam wrap if the design is too wide | Wedding party, team, or corporate set |
| Unstructured cap | Small tonal mark on the front | Heavy fill wrinkles as the crown softens | Beach-to-bar repeat wear |
| Curved-brim performance cap | Low, narrow front mark | Centered art looks high or shifted | Sport then social transition |
| Beanie | Cuff band only | Stretch ovals letters on the body | Cabin morning and après |
| Bucket or visor | Short mark on a flat front panel | Soft crown puckers under dense fill | Coastal day, low-key logo |
Ordered the wrong blank once and you'll never do it twice. The whole run comes back technically correct and socially useless, hats people accept politely and never wear again.
Pro-tips before you pick:
- One style per run: Don't force one logo across a beanie, a bucket, and a structured cap and expect it to survive all three.
- Fewer colors on texture: Textured and performance fabrics eat detail, so simplify before you stitch, not after.
- High contrast only on structure: A bold front mark needs a firm panel behind it, or the contrast just highlights the wrinkle.
If you're ordering for a group that has to look coordinated in golden hour light, start with the structured six-panel custom cap and order the stitch to fit it, not the other way around. A socially confident hat is just one nobody has to adjust, apologize for, or leave in the car.
Keep the Mark Readable at Hat Scale
More customization can make a worse hat. That's the contrarian truth most order menus skip, because menus get paid by the add-on. Every extra color, outline, and tiny icon is another chance for thread to do what pixels never have to do, which is take up physical space.
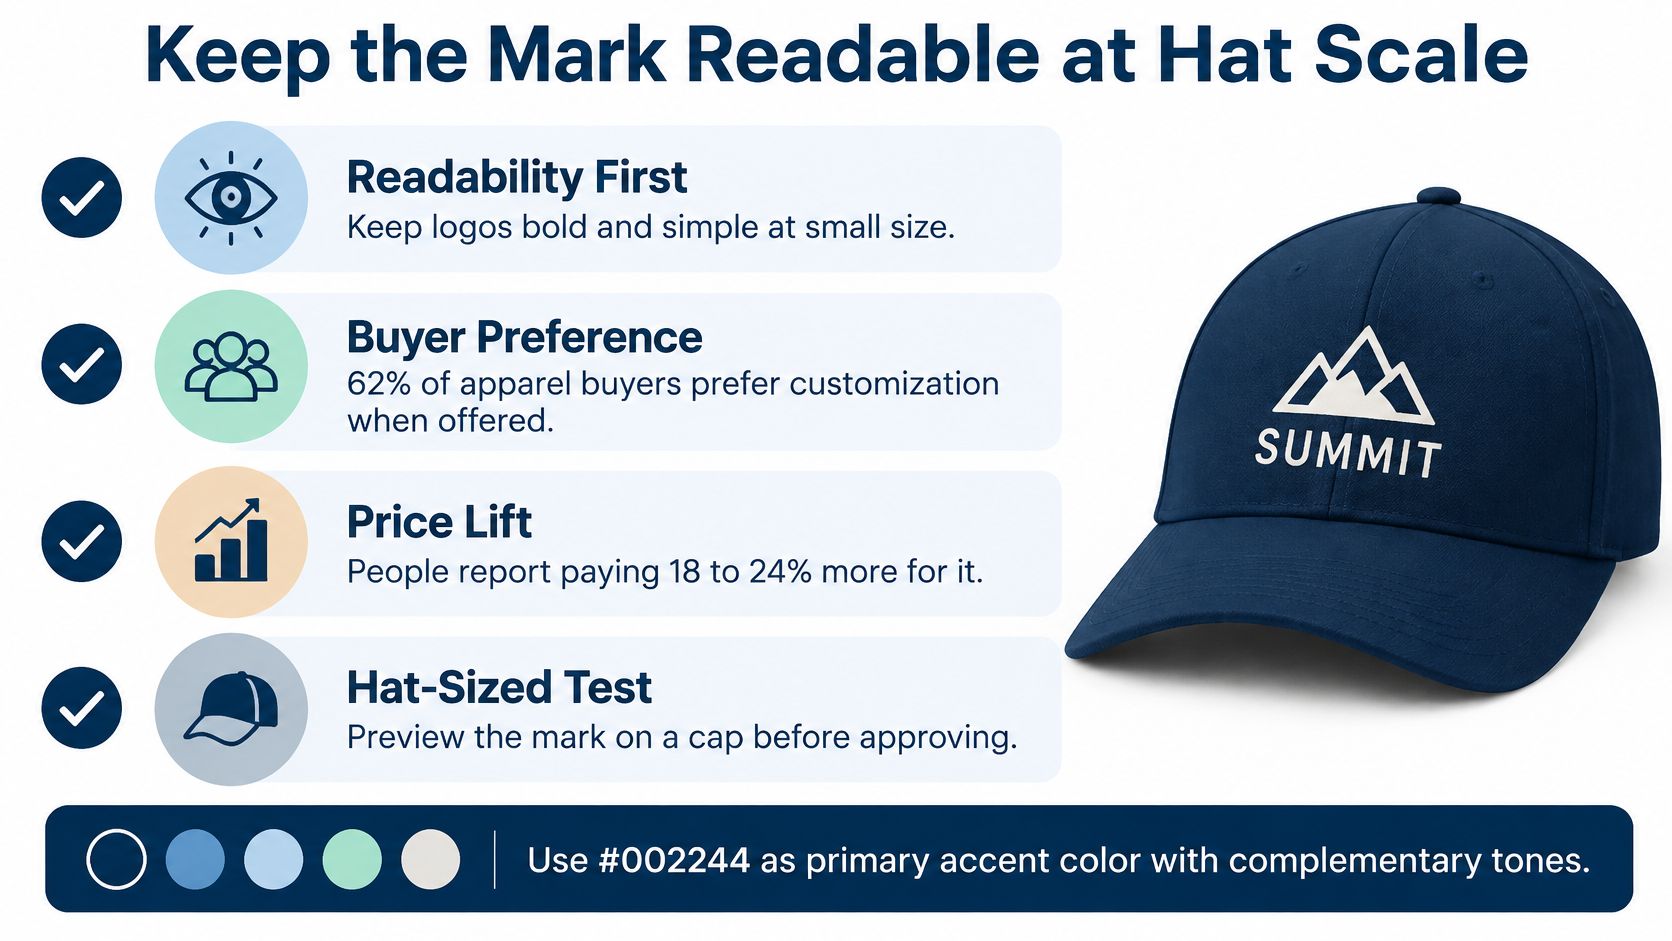
Demand isn't the problem. A 2025 market report from MarketIntelo says 62% of apparel consumers prefer customizable options when available, with reported willingness to pay averaging 18–24% above standard pricing. People want the option and they'll pay for it. That still doesn't mean they should spend that premium on detail that disappears at three feet.
Thread has thickness. Small serifs fill in. Hairline outlines vanish or close up into blobs, and a tiny icon that looked clever on your laptop turns into a smudge someone has to squint at. If a stranger can't read it while holding a drink, it's decoration for you, not communication for anyone else.
Initials Versus Names Versus a Full Mark
Count characters before you fall in love with a layout. A full name needs width a front panel doesn't always have, especially once letters get tall enough to read. Two or three initials fit almost anywhere, on a cuff, a side panel, or a small front hit, and they read clean at actual size. Save the short name or the simple two-color mark for a structured front that can carry it flat.
Group orders usually go sideways. Everyone wants their own thing, so every hat ends up different and the set reads as twelve unrelated hats. Do it the other way. Share one small mark and vary only the initials. The crew looks coordinated in the group shot, each hat is still personal, and nobody's stuck wearing a joke nickname in three inch letters to brunch the next morning. For weddings especially, that's the line between a keepsake and a costume, and it's the same coordinated thinking behind good custom embroidery clothing for groups.
Use the scale check below before you approve anything at full screen size.
Contrast Is a Wearability Decision
High-contrast thread reads across a parking lot. It's right for a one-time group identifier, a bachelor weekend, a team that needs to find each other at a festival gate. It also dates the hat to that weekend, which is fine if you accept it.
Tonal thread is quieter and, for repeat wear, usually smarter. Dark thread on a dark cap or cream on washed canvas looks like it belongs on the hat instead of on top of it. On textured or performance fabric, tonal also hides the minor unevenness that high contrast would spotlight. The hat you keep reaching for on a Tuesday is rarely the loudest one you own.
Limit your colors for a mechanical reason too, not just taste. Stacked colors mean stacked satin columns and denser coverage in a small area, which is exactly what pulls fabric and warps edges. Two colors, well spaced, will out stitch five colors crammed into the same footprint.
Pro-tips at hat scale:
- Test the smallest letter at actual size: Print it, hold it at arm's length, and if you squint, cut it.
- Drop thin outlines: Any line thinner than a single stitch will break up or vanish.
- Proof every spelling before digitizing: A wrong initial discovered after the sew is a re-order, not a tweak.
Restrained placement, few colors, and readable scale beat a logo that only works on the proof.
When you're ready to lock a fabric, order the custom embroidered cap in that exact material and judge the sample in daylight, not under shop lights. What reads on the beach at noon is your real standard.
Approve the Sample Before Bulk Production
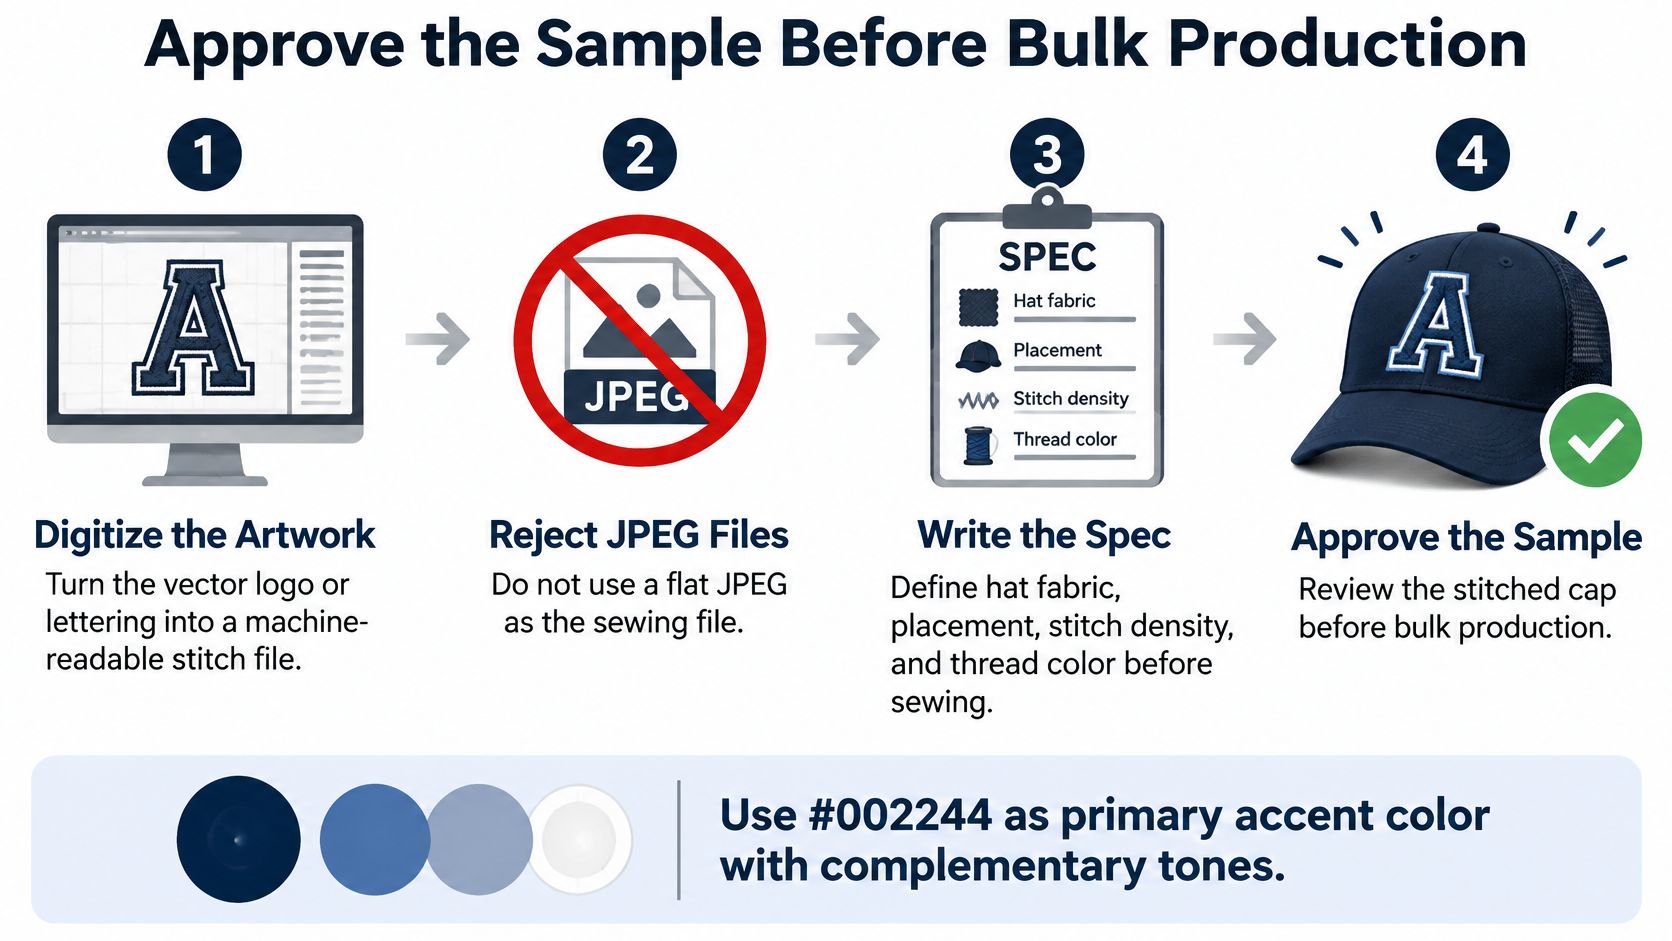
Nobody remembers the order where the sample felt slow. Everybody remembers the bulk run that arrived wrong the week of the event. Run five gates, in order, and don't let anyone talk you out of gate three because the mockup looked great.
The workflow below turns art into thread without handing your deadline to luck.
Gate 1 Digitize the Artwork
Convert the vector logo or lettering into a machine-readable stitch file through digitizing. That file tells the machine needle position, stitch direction, and density. A flat JPEG is a picture of your logo, not instructions for sewing it, so refuse it as a sewing file. If a shop says they'll just work from the image, find a different shop or accept that you're gambling.
Digitizing for a curved cap isn't the same as digitizing for a flat shirt. The file must account for the panel bending away from the needle, or letters lean and circles become oval. This is the step where hat embroidery is perfected before a single hat is hooped.
Gate 2 Write the Spec Before Anyone Sews
Put the decisions in writing. The Kaunas University of Technology embroidery research lays out this controlled sequence, specifying hat fabric, logo dimensions, thread colors, backing, placement, and closure construction before production, because textile characteristics, stitch density, fill type, and embroidered area directly affect dimensional accuracy and finished quality.
Add two measurements people forget. Record the front-panel centerline and the distance from the bill, because curved cap geometry can make a visually centered design appear shifted. Centered in the file and centered on a head are different things, and your spec sheet is where that argument gets settled in advance.
Gate 3 Sew a Physical Strike-Off
Stitch the design on the exact blank, structured or unstructured, in the exact colors. Not a swatch. Not a similar cap the shop had lying around. The most common preventable failure in this whole process is approving artwork digitally without testing it on the actual cap substrate, and it's preventable precisely because one hat costs almost nothing compared to forty.
Gate 4 Inspect Against One Defect Standard
Hold the sample and check registration, stitch coverage, thread tails, backing visibility, and crown distortion. Then run the reject list out loud. Skipped stitches, loose threads, exposed backing, uneven logo edges, panel misalignment, and sweatband or closure defects fail the sample. No partial credit, no "probably fine at distance." For a wedding party or corporate gift set, a small registration error you wave through here becomes an entire unusable batch later.
This is also where group gifting gets its discipline, the same thinking that makes custom embroidery gifts feel considered instead of bulk-ordered. One approved sample covers the shared logo, and every set of initials gets checked against that same placement.
Gate 5 Approve in Hand, Never on a Screen
Sign off on the physical hat. Photograph it, keep it as the reference, and send back three things: the approved sample confirmed, the color callouts, and the final name list spelled exactly as it should sew. Screens lie about thread sheen, panel curve, and how a color sits next to a brim. Your eyes in daylight don't.
When the Sample Puckers
Diagnose in a fixed order instead of guessing. Quality Logo Products' guide to preventing embroidery pucker is direct that puckering is primarily a process-control problem, driven by excessive stitch density displacing fabric, incorrect thread tension, inadequate stabilization, overly wide satin columns, dull needles, and fabric movement.
First, flip the hat and read the reverse for tension. You want roughly one-third bobbin thread centered beneath the design, with the remaining visible balance coming from the top thread. Second, confirm the cap is locked firmly in the cap frame, because a hat that shifts mid-sew takes your registration with it. Third, review underlay and stitch direction in the digitized file. Fourth, cut concentrated coverage by approximately 10%–15% when puckering persists, keep the underlay that anchors the material, and resew.
Sample faults and the next sew
| What you see | Likely cause | Fix before bulk |
|---|---|---|
| Crown puckers under the design | Density, weak underlay, or fabric movement | Drop density about 10 to 15 percent, keep underlay, resew |
| Reverse looks wrong | Top or bobbin tension | Aim for about one-third bobbin thread centered underneath |
| Logo sits high or off the centerline | Frame slip or curved-panel geometry | Re-hoop and remeasure from the bill |
| Backing shows or edge looks rough | Stabilizer or column width | Change backing and narrow the satin, then strike off again |
| Skipped stitches or loose tails | Needle or file issue | Replace the needle and rerun; do not trim and ship |
Know which fix you're asking for. A re-hoop, a tension adjustment, or a fresh needle is a same-day correction. A density cut, narrower satin columns, or a backing change means a revised digitized file and another sample day. Build that second day into your timeline now and it will never become an emergency later.
Practical rule: If the fix lives in the file, budget a new strike-off. If it lives in the frame, budget an hour.
For a bachelor party or groomsmen set, approve the shared mark once and hold every hat to it. Then order the embroidered caps for the full crew with a standard, not a hope, and spend the weekend wearing them instead of explaining them.
Set Placement Before You Talk Price
Placement is a measurement, not a vibe. Decide where the mark sits, prove it on the sample, and only then argue about money, because half the things that change your bill are placement and coverage decisions wearing a price tag.
Measure from two fixed references: the front-panel centerline and the bill or cuff edge. Write both numbers on the spec. Keep the stitching on one panel so it doesn't cross a seam or climb over the button, where the needle has to fight raised fabric and your clean edge turns into a wobble. A design can be mathematically centered in a file and still look high on a curved brim, which is why the sample, not the mockup, is your placement proof.
Side and back marks play by tougher rules. Those panels curve harder, the usable area shrinks, and closure hardware gets in the way. Keep side and back hits smaller than the front, a monogram, a date, a tiny icon. If you want reference points beyond hats, logo placement guidance for branded workwear is a useful cross-check for how placement conventions shift by garment, though the cap's curve still gets the final vote.
What You're Actually Paying For
Separate the bill into decisions you control. Extra thread colors add machine stops and color mismatch risk, and they add visual noise at hat scale. Two or three colors stay wearable. Dense fill costs more stitches and more sew time, and on a soft crown it's the first thing to cut, so you're often paying extra to create your own pucker problem.
Digitizing is its own pass, not a free click. Plan for one revision before the sample, because the first stitch-out almost always teaches you something the file review didn't. The strike-off feels like a delay but works as insurance, since one rejected bulk run costs more in money and goodwill than a dozen samples. These line items are why custom group shirts and group hat orders both punish last minute improvisation, because coordinated sets multiply every small shortcut.
Initials beat full names on cost and risk both. They take less width, less sew time, and give you fewer letters to misspell across a list of groomsmen you collected by text message at midnight.
What changes the embroidery bill and the date
| Decision | What it changes | What to expect |
|---|---|---|
| Thread colors | Stops, mismatch risk, visual noise | Two or three colors stay wearable |
| Stitch density | Pucker risk and sew time | Cut heavy fill on soft crowns |
| Digitizing | Flat art becomes a stitch file | Plan one revision before the sample |
| Strike-off | Proof on the real blank | Do not approve from a screen |
| Event date | Embroidery is an extra production pass | Add the stitch day before transit |
Timing is the last trap. Embroidery is a separate production day from pulling and shipping a blank, so an event date needs the stitch day plus transit, not a blank-goods promise someone made you over the phone. Count backward from the wedding, the Tahoe weekend, the company offsite, and give the sample its own day in that count.
Lock placement, cut the colors you don't need, and then order the custom cap knowing exactly what each dollar is doing. A hat that arrives on time and sits straight pairs with everything from a flannel to a robe at the cabin, and nobody at the party ever asks what it cost.
Care for the Hat and Confirm the Order
A good sample earns you a hat worth keeping, and keeping it is a practice, not a promise printed on a tag. Start with a look at the care label you'll be following for the life of the hat.
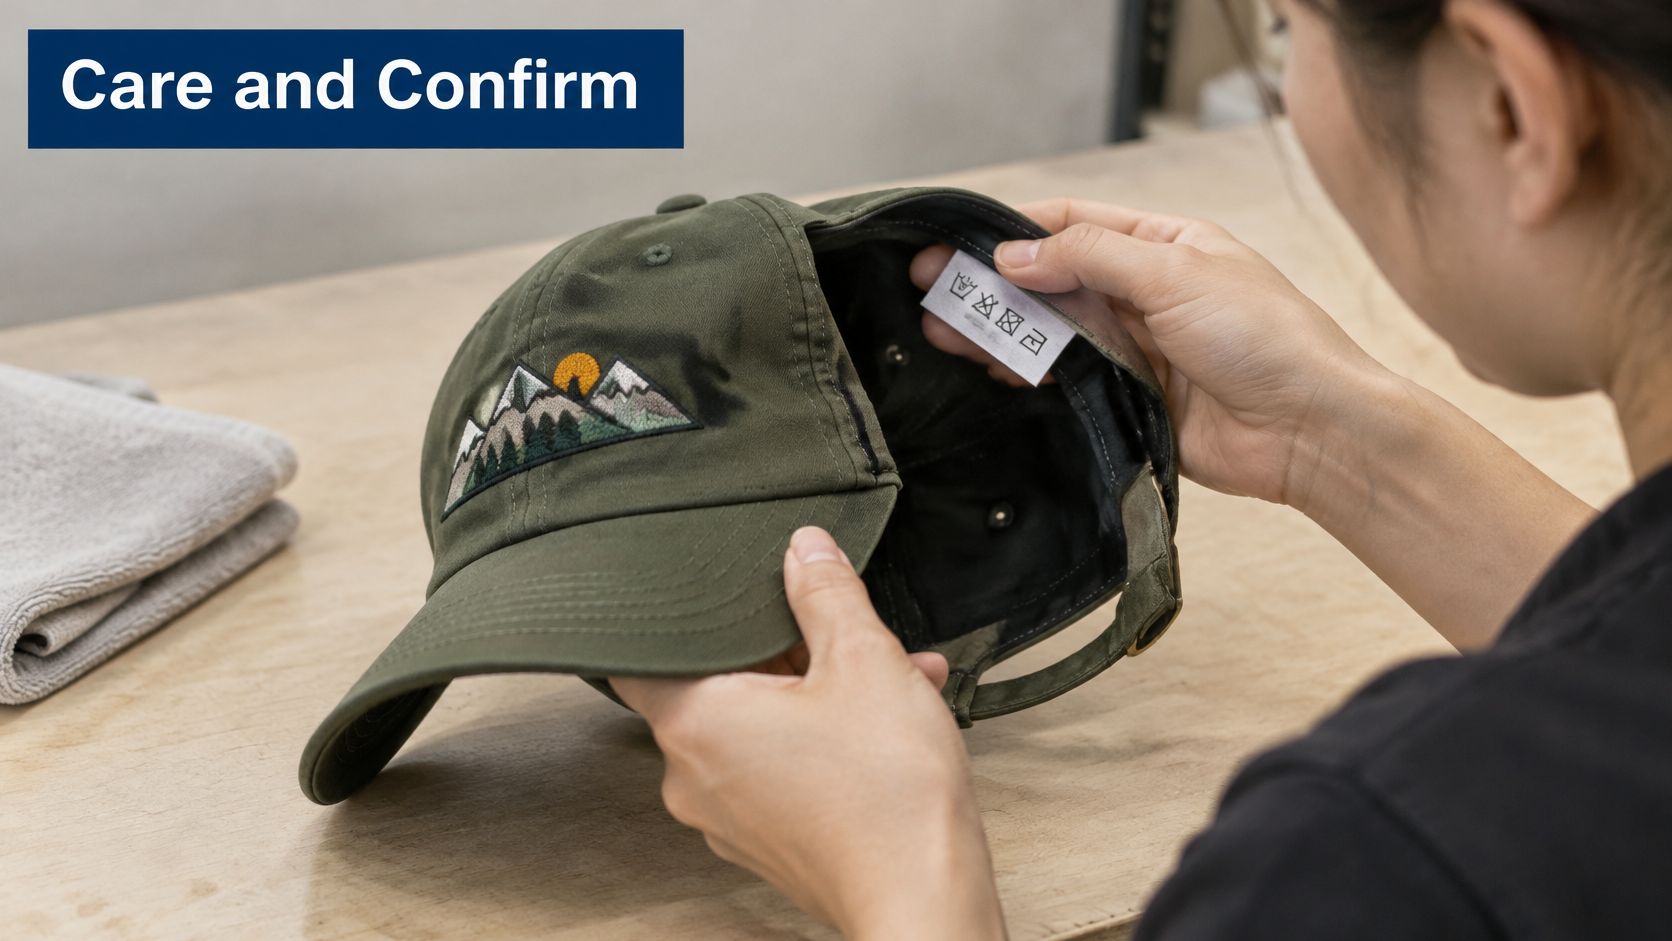
Recent durability research in PMC frames garment longevity as an interaction between the item, its environment, and user practices such as care, mending, and repair, not as a fixed property of the fabric. Translation for your hat: the mountain weekend, the salt air, and how you wash it will decide its lifespan together.
Dense stitching cuts both ways. On a sound crown it can reinforce a spot. On a crown that was already distorted in production, it becomes a stress point that works against the fabric every time the hat flexes, which is one more reason the approved sample matters more than any care slogan. A pulled thread can often be repaired if the backing is still sound. A puckered crown usually can't, so buy the shape right the first time.
Watch the wash and care steps in motion before your first laundry day.
Choose Material by Activity, Not Slogan
Material fit for the hat's real activities
| Material | Best for | Watch for | Care |
|---|---|---|---|
| Cotton or wool blend | Cold cabin air and a soft hand | Heat can shrink the crown around the stitches | Gentle cycle, skip high heat |
| Recycled polyester or performance cloth | Sweat and frequent packing | Tight packing can crease the panel under the mark | Gentle cycle, follow the blank label |
| Any blank in salt or sun | Coastal days at the beach | Salt and sun need a rinse sooner than a mountain weekend | Rinse soon after use |
| Any embroidered blank | Repairs | Pulled thread can be fixed if backing is sound; a puckered crown usually cannot | Do not iron across the embroidery |
Cotton and wool blends suit cold cabin mornings, coffee on the deck, the hat you pull on for firewood. Recycled polyester and performance cloth handle sweat, pack flat in a duffel, and forgive the drive home from the beach. Rinse salt out soon, wash gentle, skip the high heat that shrinks a crown tight around its stitches, and never run an iron across the embroidery. If you're building a coastal set, it's worth seeing how a surf trucker hat handles that water-to-social transition before you commit a logo to it.
How Ordering Works Here
Our custom embroidery is machine embroidered at our Fairfax, CA location, and the add-on is $30.00 USD. After you add an embroidery item to your cart, we contact you to confirm the name or monogram to be embroidered, and embroidery orders take an extra day for the embroidery service. Embroidered products cannot be exchanged or returned unless they are defective, which is exactly why we confirm spelling with you before a needle moves.
If you would not wear the sample twice, do not embroider the set.
If you're coordinating a larger group buy on the operations side, preparing POs for Amazon FBA offers a solid primer on clean purchase order habits that keep bulk orders from turning into spreadsheet chaos. For everyone else, the checklist is shorter: blank chosen, mark simplified, sample approved, names spelled, stitch day counted.
Complete the Look for the drive home or the first drink: the embroidered hat on top, a High Sierra layer for the cold lot, and a robe waiting at the cabin or beach house. Join the Vital Few newsletter for first word on the next drop, then get outside and let the hat do the introductions.
Order your custom embroidery hats the Cowboy way, with a restrained mark on the right blank, machine embroidered in Fairfax and confirmed with you before it sews, so the hat you wear into the lot, the bar, and the cabin actually earns its place. Browse hats, High Sierra layers, and robes for the whole crew at California Cowboy, and build a set people will still be wearing long after the weekend ends.

